
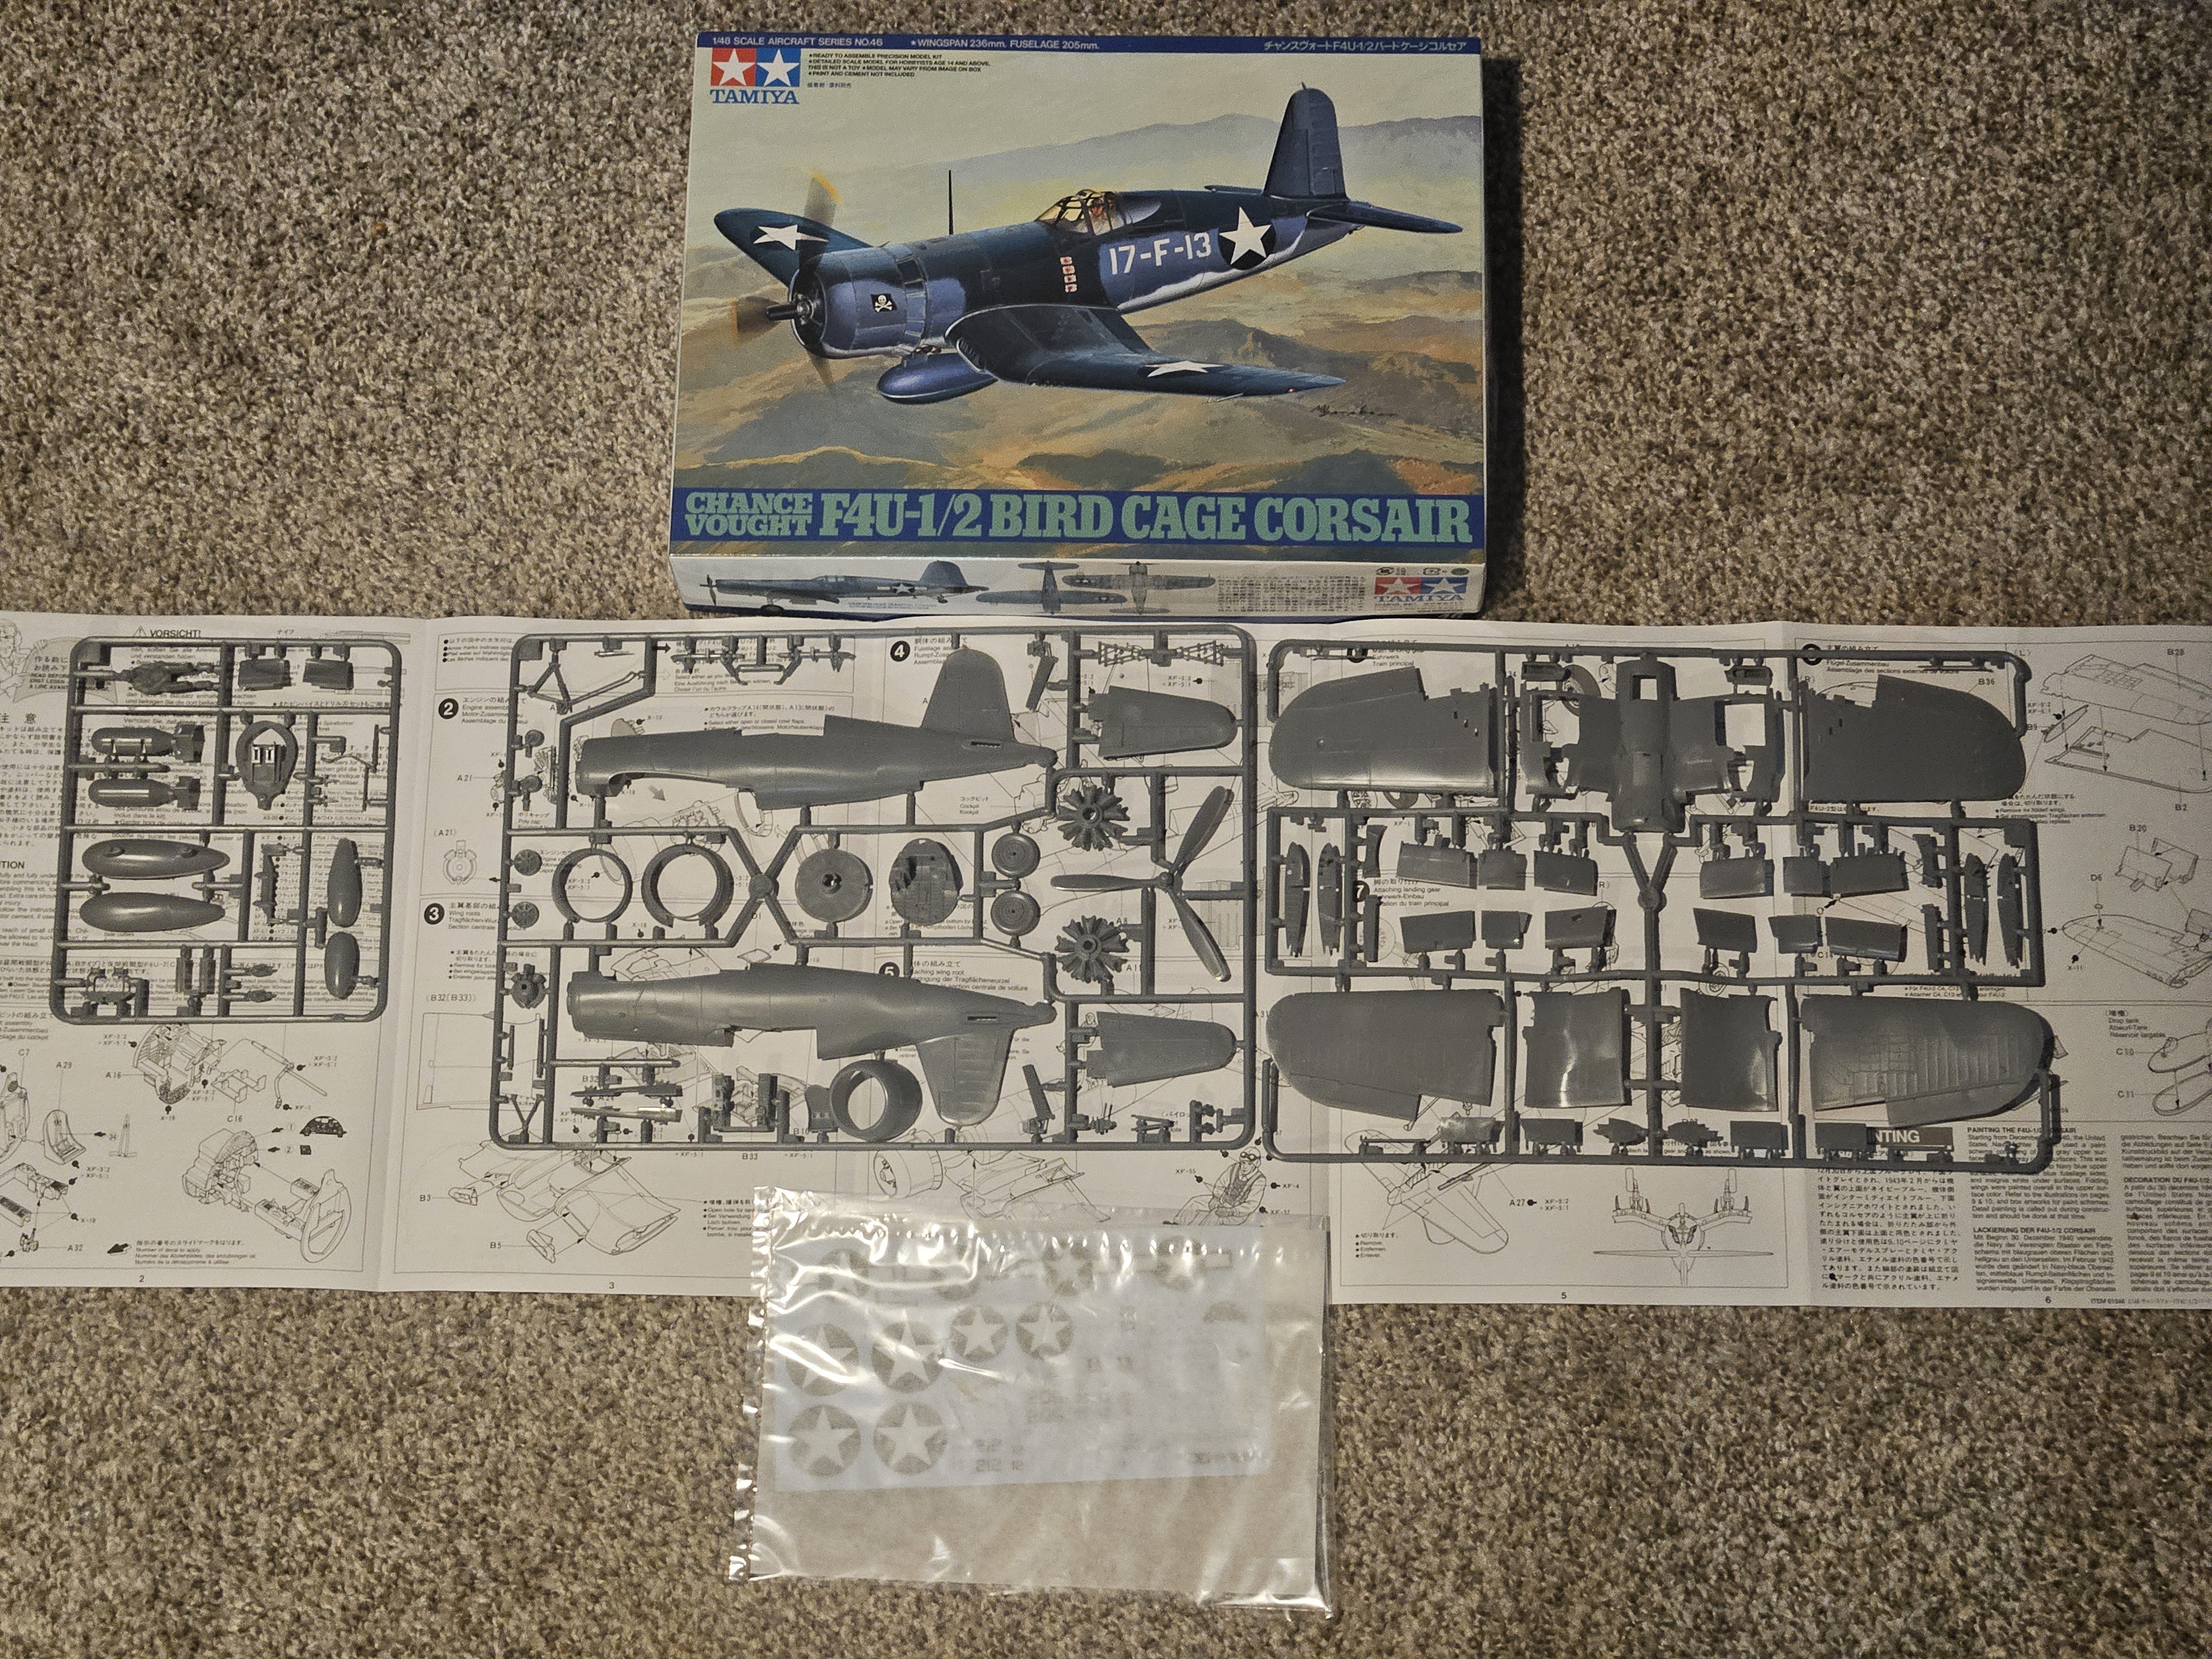
And with 50% of the final vote, the winner of the which-model-do-I-build-next competition is...THE CORSAIR, a 90-something-piece Tamiya kit from 1996. Build thread starts here, so bookmark this post if you wanna follow along. Gonna try to be as detailed as possible.
03:02 PM - Jan 20, 2024
This kit was made from almost 30yo molds. Fortunately, there's virtually 0 flash, which can be a hassle with older kits (did one from the 60s that was...oof). Tamiya's work from this era has a reputation for quality, with good fit and a level of detail almost on par with their modern kits.
03:02 PM - Jan 20, 2024
First step will be washing the sprues. This removes any lingering mold release agent from manufacturing, which can cause paint and primer to bead instead of sticking. Some never bother with this step, as the presence and amount can vary even in the same box, but I skipped it once and regretted it.
03:02 PM - Jan 20, 2024
I just use warm water, dish soap, and a sponge. Some soak, some use a toothbrush, some even use vinegar. A quick wipe with soapy water is what's mostly commonly recommended, though, so that's what I do.
Gonna let em dry, and with luck, assembly starts tonight. See you then!
Gonna let em dry, and with luck, assembly starts tonight. See you then!

03:02 PM - Jan 20, 2024
This thread is as much a tutorial as anything. The hobby needs new blood; diverse doers with diverse interests spur manufacturers to make more varied subjects, instead of the 500th version of a Panzer IV. But it can be intimidating to start, and I'd like to eliminate some of that mystique.
12:02 PM - Jan 21, 2024
Sprue cutters. This is as basic as it gets. Get as flush as possible and snip fast; going slow can stretch the plastic instead of cutting cleanly. Whatever spur is left can be shaved off with a thumbnail or Xacto knife and smoothed with an emery board (I use a foam one with 7 different grits).

12:05 PM - Jan 21, 2024
Step 1. Cockpit assembly. Always think ahead; small or interior parts have to be painted as you go; they can't be reached later. Not every paint company has the same colors, and not every kit maker assigns colors from the same paint co. I usually just go with the closest thing I have on hand.

12:10 PM - Jan 21, 2024
Here, that was Vallejo Model Air Interior Grey Green. It's lighter than reference pictures, but whenever a rivet-counter questions a color choice, you answer that a combination of sun exposure and emulating period-appropriate photo film is what got your result. I also added 3 decals at this point.


12:17 PM - Jan 21, 2024
You'll notice the decals seem rather flat. This is before application of MicroSol, a solvent that softens the decal plastic and "sucks" it down to conform to surface irregularities, helping to give a painted-on look.
12:19 PM - Jan 21, 2024
The brushed-on paint is also pretty rough, but remember: nobody but a model show judge will look as closely as you do when building. These small interior parts, obscured by the canopy, can be a little rough. And from regular viewing distance, mistakes just look like wear and tear. Realism!
12:22 PM - Jan 21, 2024
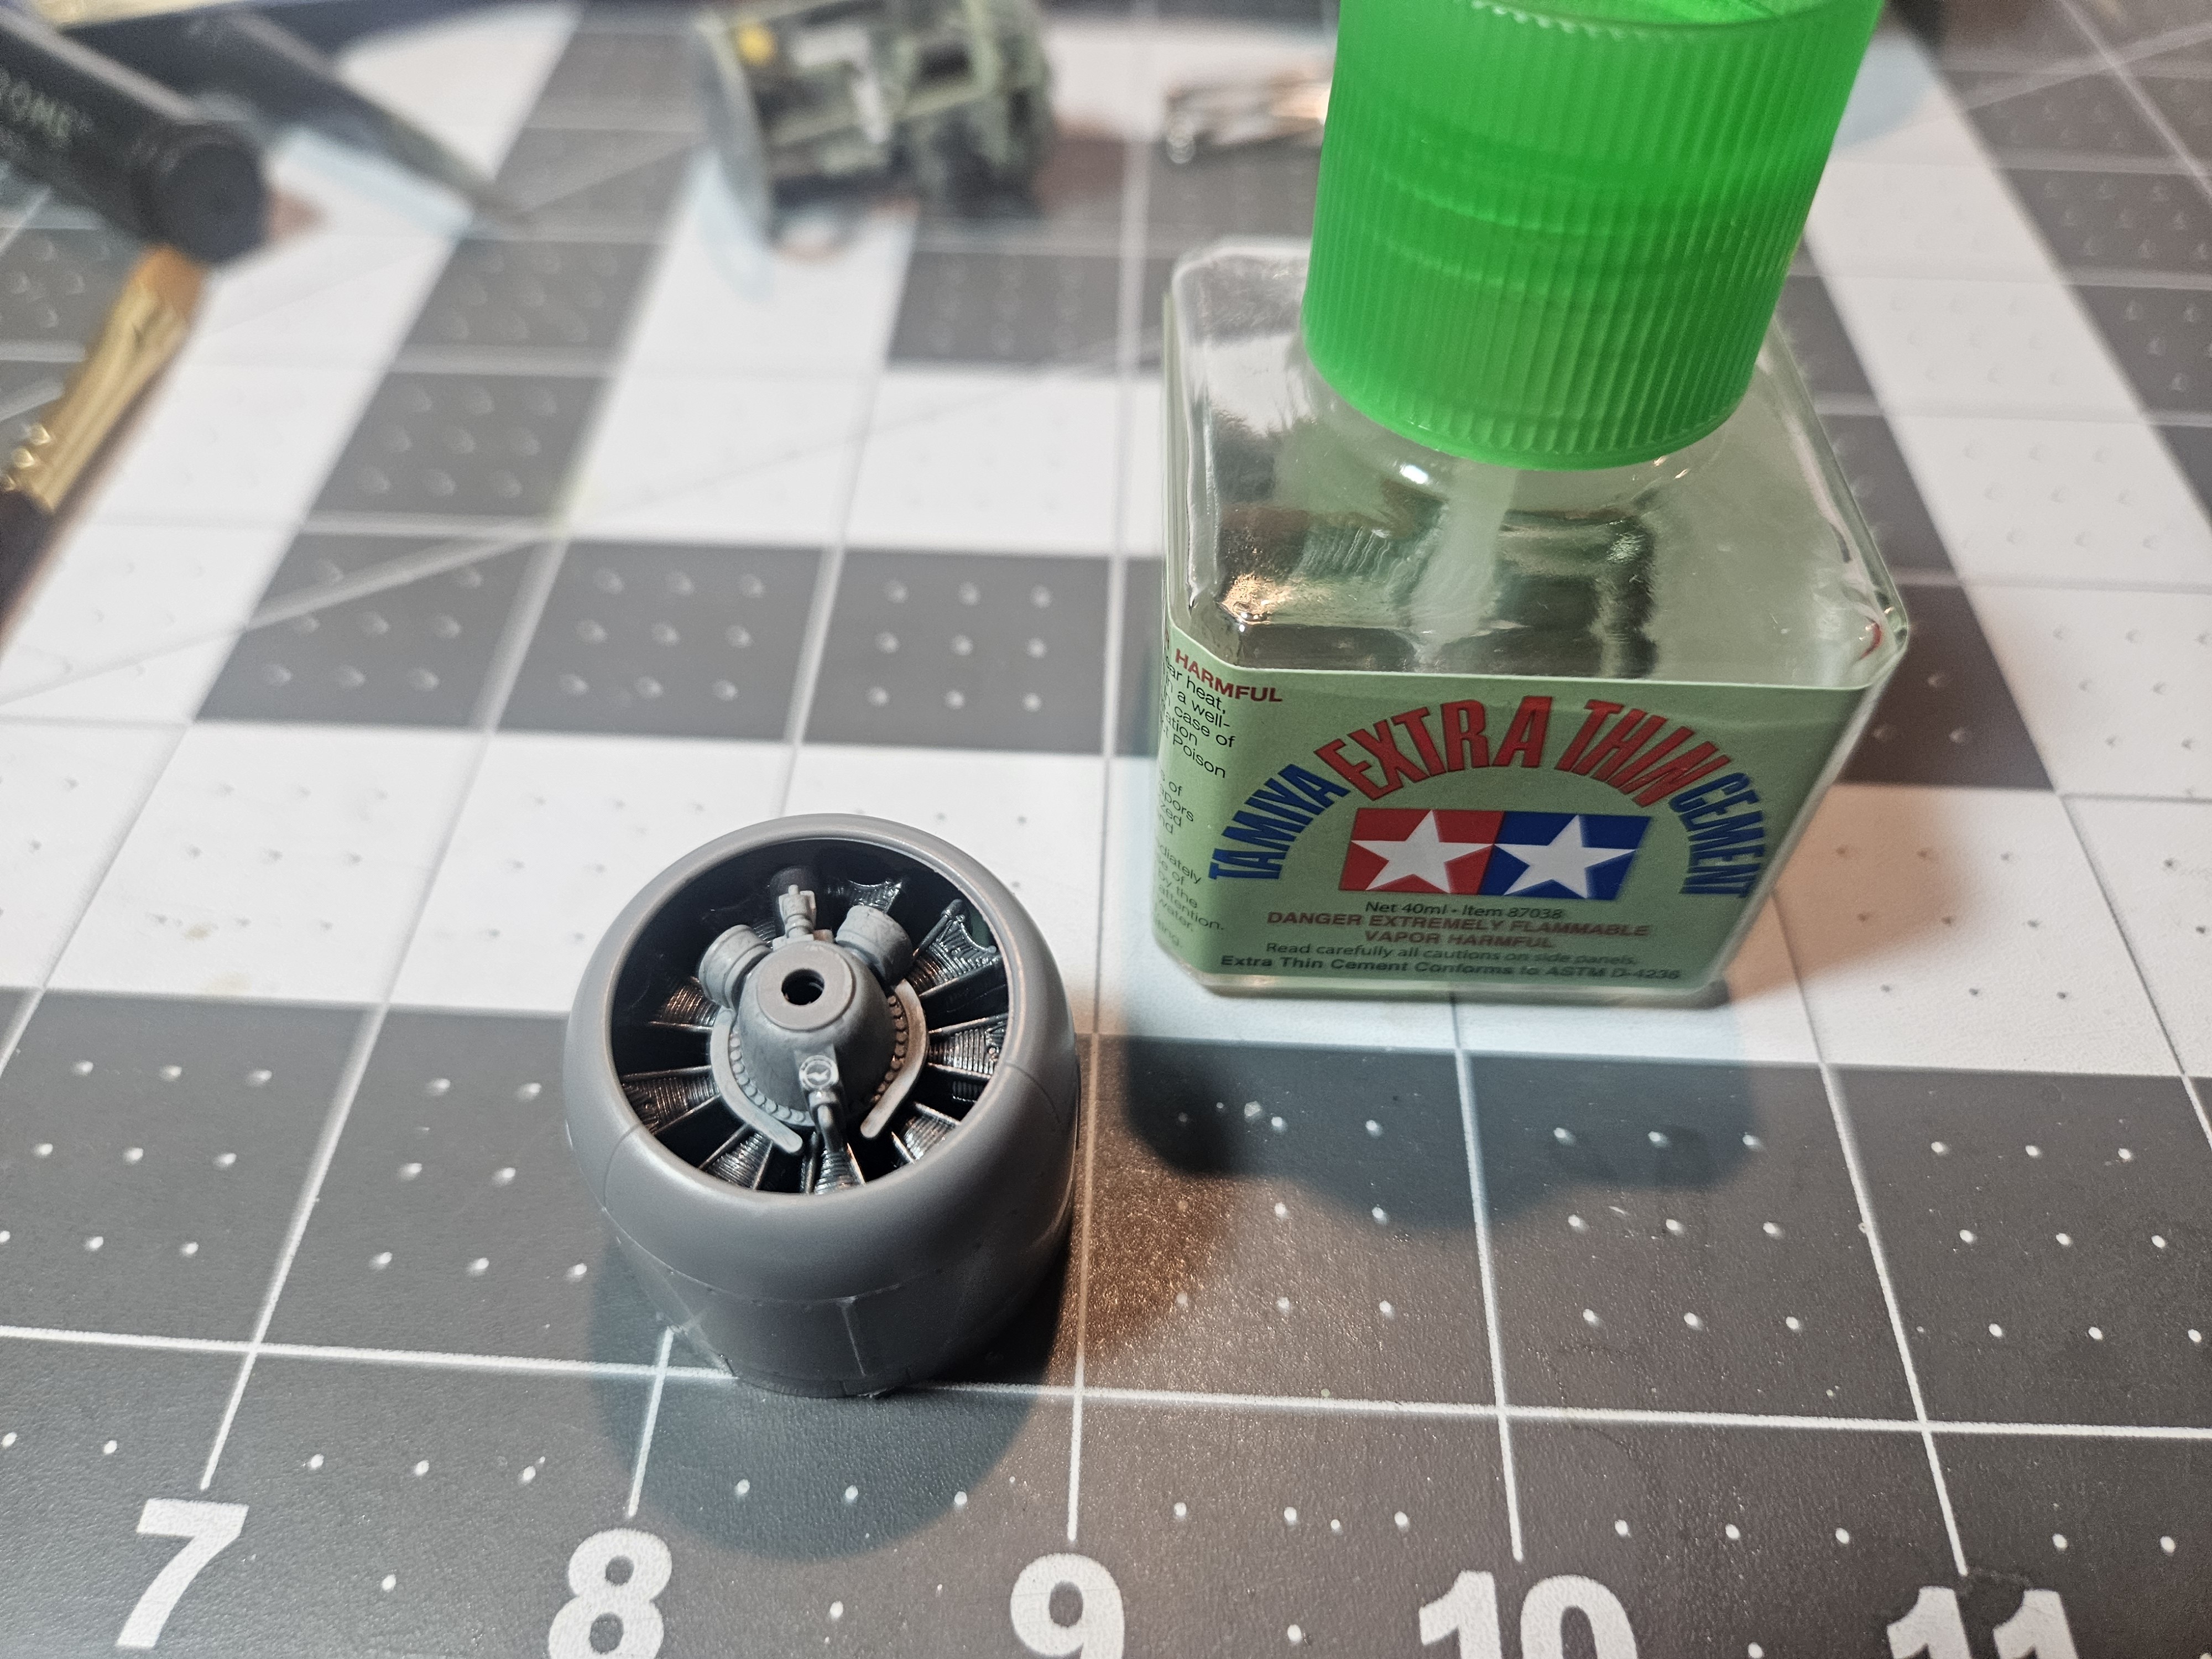
Didn't get much time for building today. Luckily, step 2 is an easy one! Engine assembly is just painting a few parts and then stacking them up so you don't even see most of them! This does give us our first decision point, though: the option of open or closed cowl flaps.

09:10 PM - Jan 21, 2024
On the real plane, these flaps allow more air to move around the engine, keeping it from overheating. Open is a good choice if I were doing a grounded plane, for example, but I plan to display this one flying through the air at 300mph, which would keep the engine cool enough with flaps closed.
09:14 PM - Jan 21, 2024
Vallejo's Metal Color line of metallic paints are great. Very thin, which is good for airbrushing and runs into tight spaces well when hand brushing. They've also got at least a dozen colors, so you're bound to find the exact shade of shiny gray you need. Here we have all the pieces ready to go.

09:21 PM - Jan 21, 2024
And this is the finished engine. See what I mean about most of your hard work being hidden?
Btw, Tamiya Extra Thin cement is what holds it all together. It's a solvent that melts the plastic, basically welding it. Extra thin means capillary action can draw it into the tightest seams between parts.
Btw, Tamiya Extra Thin cement is what holds it all together. It's a solvent that melts the plastic, basically welding it. Extra thin means capillary action can draw it into the tightest seams between parts.
09:26 PM - Jan 21, 2024
That's it for today. Next time is...wing roots, and more choices to make!
09:38 PM - Jan 21, 2024
Step 3 is pretty straight forward, but it had some details to note: removing part of a piece in anticipation of folded wings, and drilling a hole to mount a bomb later. We won't be doing either. It also had our first clear part, D1, but says it will be painted over. Not sure why it's clear.

09:15 PM - Jan 22, 2024
The fit was good, but still a bit stubborn in places. It helps to have something to clamp pieces together while the cement cures. You want pressure like a firm finger grip, but not so much that it deforms the plastic. In this case, toothpick shims helped the clamps reach a narrower spot.

09:18 PM - Jan 22, 2024
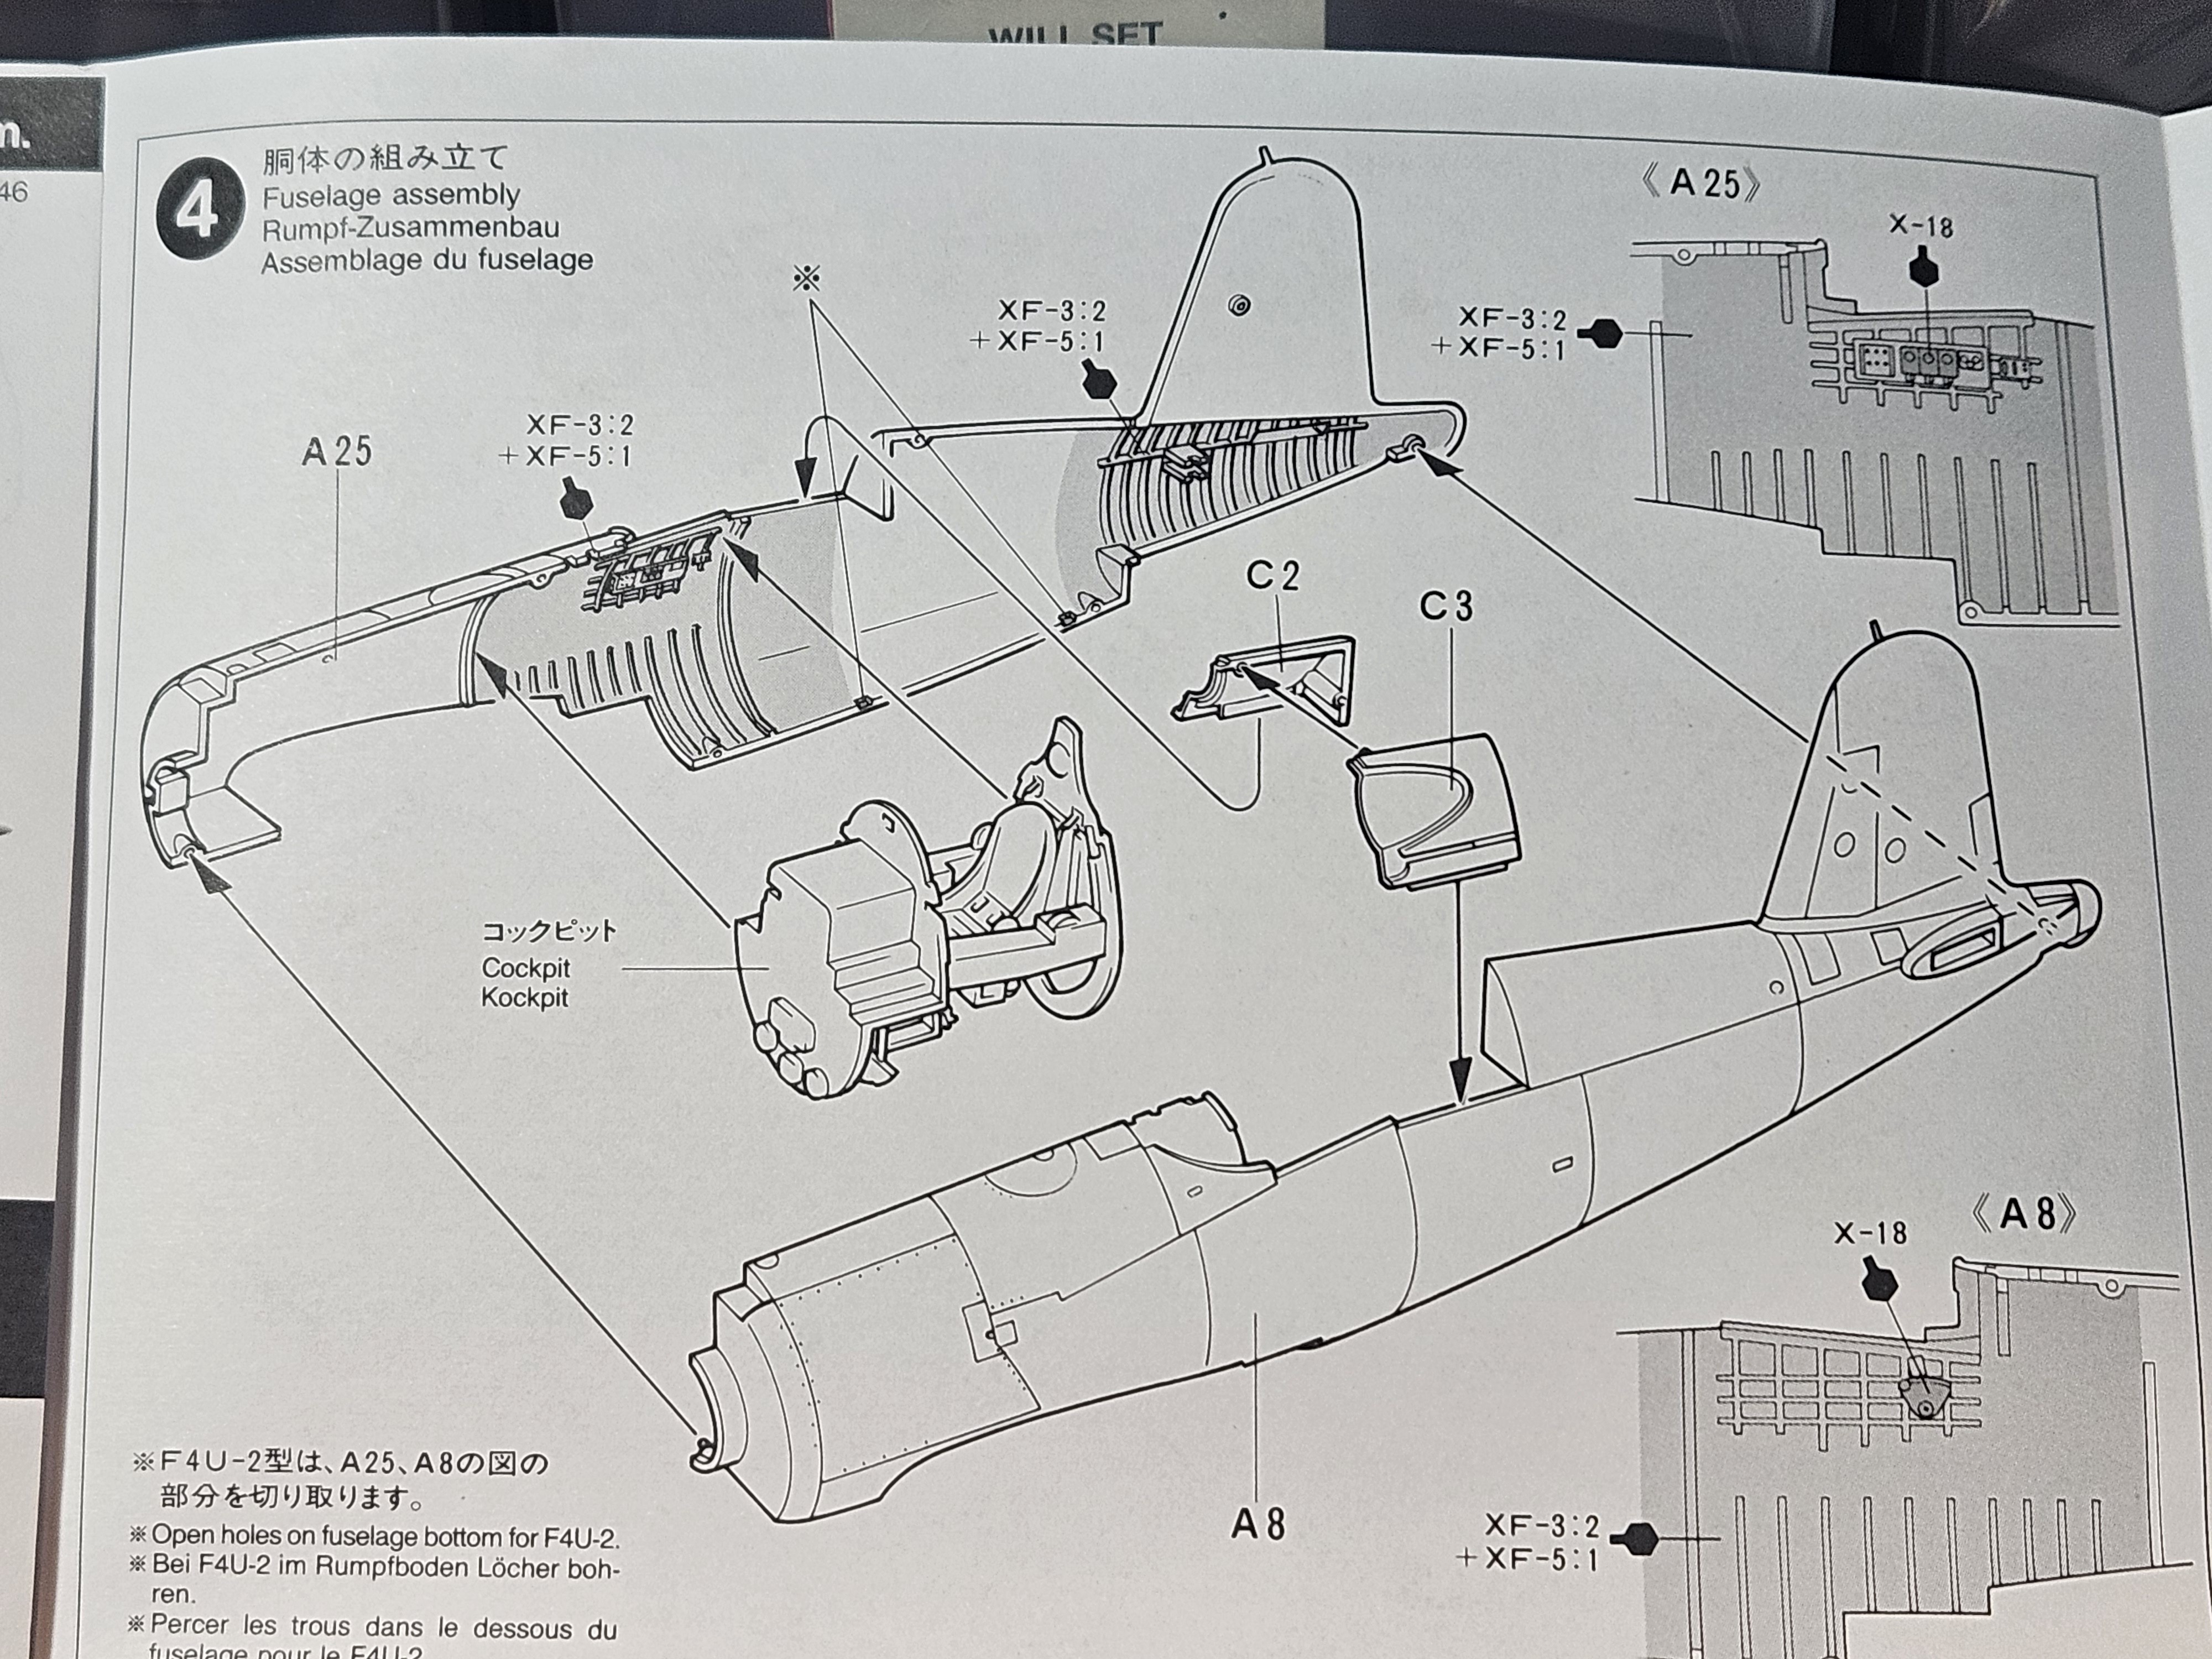
Remember that cockpit we built first thing? It's time to snug it in between the fuselage halves. I used a toothpick to scrape paint off the areas that would be cemented. Cement will burn through the paint easily enough, but the resulting bond isn't as strong, and paint can gum up the cement brush.
09:23 PM - Jan 22, 2024
Clamps again, and rubber bands. They can hold together parts that are too big or awkward to get a clamp on. Careful, though! This type, at least, can be melted by even a small amount of excess cement squished out of the seam. Luckily, by the time it snapped the bond was already solid.

09:28 PM - Jan 22, 2024
Step 5 puts everything we've built so far together. It's also where you add the pilot, but I don't typically do pilots. The detail is usually bad, they often don't fit well, and, since these are usually based on actual historical machines with known pilots...that's a real dude and it's weird to me.

10:16 PM - Jan 22, 2024
Oh no! Guess I never hit send on the last post. Here's step 5 complete, and we've finally got something resembling an airplane!

09:58 PM - Jan 23, 2024
I'd also originally had something clever about an unplanned wrench in the build, but apparently never posted that either. Anyway, a wild learning opportunity appears!
Step 6/7 is landing gear. I've said the plane will be depicted in flight, so gear will be retracted.
This kit doesn't have that.
Step 6/7 is landing gear. I've said the plane will be depicted in flight, so gear will be retracted.
This kit doesn't have that.

10:02 PM - Jan 23, 2024
Fortunately, we do have the holes where the gear would retract to, and the doors that would cover them. They're not made to be shown closed, but that's what snips and Xacto knives are for.
With scrap sprue as support posts, each door was carefully positioned with much fiddliness.
With scrap sprue as support posts, each door was carefully positioned with much fiddliness.

10:06 PM - Jan 23, 2024
These doors were never meant to fit, just look like they should, so they're not as snug as other pieces. A bit of filler putty patches the worst gaps, and what remains we can chalk up to the realism of wear and tear on a South Pacific combat deployment.

10:09 PM - Jan 23, 2024
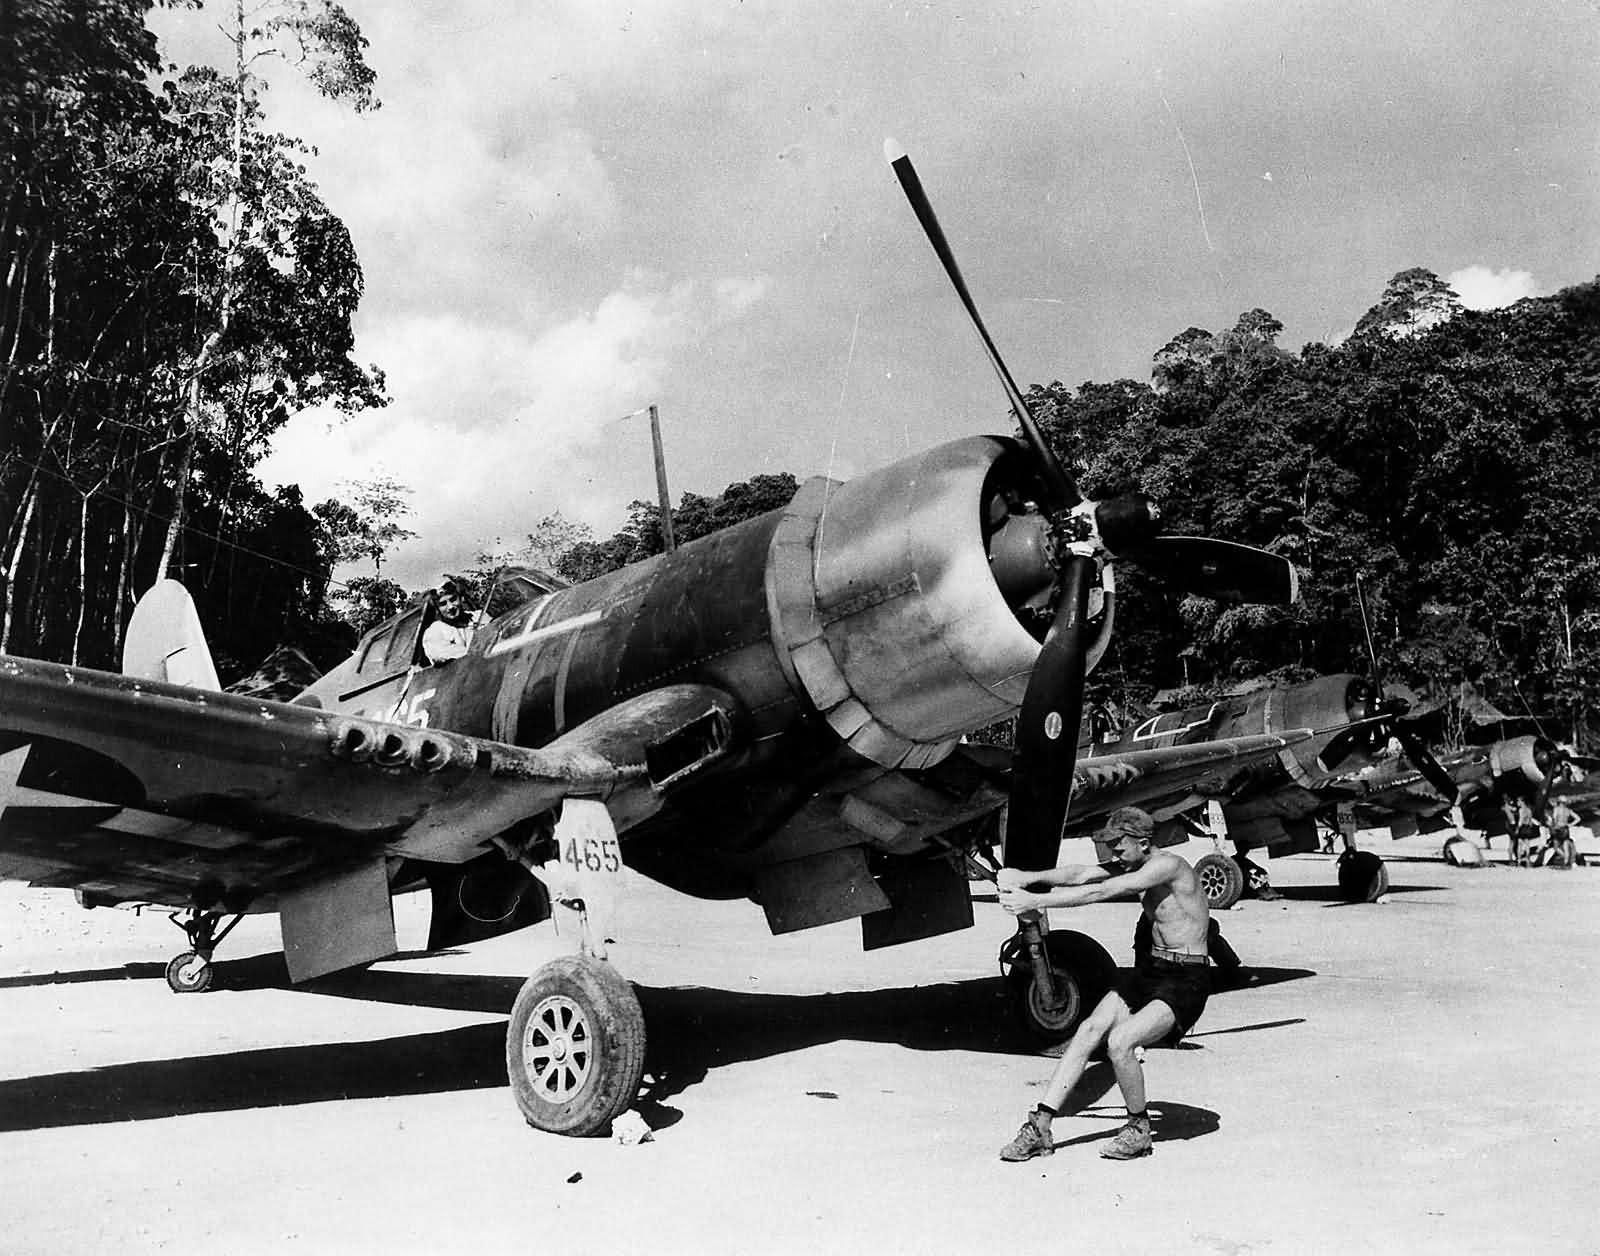
The tail gear was particularly frustrating, until I found this reference picture showing how the retracted wheel should barely poke through the hole in the doors. After a good couple hours' detour with this snafu, we're ready for tomorrow's section: wings!


10:14 PM - Jan 23, 2024
Step 8 was simple: assembling the wings. There were options for the F4U-2 night fighter version here, but we're doing the regular F4U-1 model. I skipped step 9, since it's for payloads I'm not using.

09:45 PM - Jan 24, 2024
Step 10 was more wing flaps and the propeller. I went ahead and painted the prop here, but I won't attach it until after painting the rest. Step 11 is canopy assembly. Not doing that yet, either, since D7 and D8 will cover areas that need fuselage paint.

09:49 PM - Jan 24, 2024
Finally: step 12. This is the last step, so it means we're halfway finished! (I kid. Somewhat.) Several earlier parts being negligibly out of position compounded to make the wings fit less flush than other pieces, but it was nothing a little gap filler and a helping of cement couldn't handle.

09:54 PM - Jan 24, 2024
Would you look at that? We built an airplane! Next is painting. I plan to use my airbrush, which I haven't touched since moving my hobby room 2 years ago. Gonna do some practice runs first, and I've got a busy couple work days ahead, but hopefully we'll finish this bad boy this weekend!

10:01 PM - Jan 24, 2024
Well, the weekend (and Monday, oof) were busier than I expected, but we're back in business now! Before paint, we've gotta prime, and before primer comes masking off everything we don't want covered. In this case, that's window panes and the already-painted engine.

12:55 PM - Jan 30, 2024
I forgot to get a picture of the primer coat, but use your imagination to paint that last pic flat gray, with every detail (and flaw!) suddenly very visible.
12:59 PM - Jan 30, 2024
Here's the paint scheme we're using. Color callouts are for Tamiya paints,and I'm using Vallejo, so I tracked down a color matcher that shows equivalences across brands and cross referenced other sources to pick which shade of Vallejo to use.

01:03 PM - Jan 30, 2024
Base coat done! Color came out a lot greener than the pale blue-gray I expected, and mostly just looks gray here. The most important takeaway is that I finally got my airbrush dialed in.

08:22 AM - Jan 31, 2024
Post shading! Lots of modelers do panel lines in black before the base coat. It makes for a dramatic, detailed look, but to my eye it's too schematic-y. I did the same after the base coat using a darker shade of that color, then randomly mottled the panels with a slightly lighter color.

12:00 PM - Feb 02, 2024
Moment of truth! Post shading now covered with another layer of the base color. This knocks down the contrast and blends the lighter and darker colors toward the base shade, giving an overall subtle variation to the finish, befitting an aircraft that's on deployment and actively working.

12:04 PM - Feb 02, 2024
Working on a clear coat this evening, in the meantime I thought I'd point out some things I overlooked when they were relevant.
1: Before priming, I wiped the whole plane down with isopropyl alcohol (I use lens cleaning wipes for glasses, but any drugstore bottle will work).
1: Before priming, I wiped the whole plane down with isopropyl alcohol (I use lens cleaning wipes for glasses, but any drugstore bottle will work).
04:35 PM - Feb 05, 2024
The alcohol gets any fingerprints off the model to make sure the primer will stick uniformly.
2. After the wipedown, I've been wearing disposable vinyl gloves any time I handle it. No sense getting rid of fingerprints if I just add more.
2. After the wipedown, I've been wearing disposable vinyl gloves any time I handle it. No sense getting rid of fingerprints if I just add more.
04:36 PM - Feb 05, 2024
3. The clear canopy pieces were attached with PVA glue, aka Elmer's white glue. The bond isn't as strong as the cement used elsewhere, but the clear plastic can fog up when exposed to fumes from cement or superglue. PVA goes on easy enough with a toothpick, dries clear, and gets the job done.
04:40 PM - Feb 05, 2024
No pictures till the clear coat is done, but I'll go ahead and explain it. A glossy clear coat protects the paint and provides a smooth surface for decals to grip. Smoother surface means better adhesion and less chance of air bubbles under the decal.
04:42 PM - Feb 05, 2024
Spend any time perusing modeling communities, and you'll find constant references to Future, a floor polish that doesn't exist anymore. This is the same stuff, rebranded. Thin enough to airbrush, dries hard and clear, doesn't react with other products, and one (cheap!) bottle lasts dozens of models.

09:03 PM - Feb 06, 2024
Time for decals! This kit has 4 different marking options. Some decals, like the star insignias, are common across versions; others, like nose art, are unique. In other words, we won't be using all of these.

10:31 AM - Feb 09, 2024
Decals aren't stickers. They're very thin; you soak them in water, then slide them off their backing and onto the model. After careful positioning, I coat them in Micro Sol, which I've described previously. As they soften, they wrinkle and look ruined; that just means the solvent is working.

10:35 AM - Feb 09, 2024
Discoloration is common when the model gets wet, either from the water on the wet decal (here) or from Micro Sol. This is why we start with a clear coat to protect the paint. Once it dries, the color will return to normal.

10:39 AM - Feb 09, 2024
Another dose of gloss clear seals and protects the decals. Then I cover that with flat clear, which will give everything to come more to hold on to. It's weathering time!
01:10 PM - Feb 20, 2024
(Edited)
There's a hundred thousand weathering techniques. Each of them has modelers who swear by them and others who've sworn off them. I like to try different things on each model I do to figure out what works for me. Today, I learned that salt weathering doesn't work for me.

01:14 PM - Feb 20, 2024
The idea of salt weathering is this: you wet the model then sprinkle it with salt. The water sticks it in place. Once dry, you do a thin coat of tinted base color. When that dries, you brush the salt away. The grains act as small, irregular masks, protecting the underlying color.
01:17 PM - Feb 20, 2024
It's just another way to subtly break up and vary the finish. Unfortunately for me, the salt mostly dissolved, leaving white spots. Where it worked as intended, the result was less "subtle variation," more "dalmatian." No doubt there was plenty of user error; I caught several mistakes as I worked.
01:21 PM - Feb 20, 2024
Still, I'm not sure it's worth the trouble even if I did it perfectly. But that's a valuable lesson I'd rather learn on my 7th model than my 27th. Meanwhile, I've got to recover from the screwup. More in that later.
01:30 PM - Feb 20, 2024
It occurs to me that I haven't really explained weathering. Basically, unless you want to depict a museum piece or a subject fresh off the assembly line (totally valid btw, and common for cars), you've gotta make the machine look like it's seen a little (or a lot) of use.
08:53 PM - Feb 20, 2024
Weathering covers everything from dirt and chipped paint to bullet holes and fire damage, and it can make or break a model. Do it right, and you've cranked your realism way up. Do it wrong, and you've ruined the model you spent the last couple dozen hours building and painting.
08:56 PM - Feb 20, 2024
The trick to good weathering is references. This is how you know where dust tended to settle, how mud would splash, paint would fade, exhaust would stain, and so on. With military subjects, photos abound (though often black and white), but the one angle you need will somehow always be elusive.
09:01 PM - Feb 20, 2024
Here's a few references I'm using for this project. Mine won't be quite as worn as some of these, but it's easier to work backwards from exaggerated references than guess based on cleaner versions.


09:16 PM - Feb 20, 2024
Now, back to my salt escapade. I filled my airbrush with water, cranked it to 40psi, and gave the plane a few good rinses. Then I went over the whole thing with a wet tooth brush and cotton swab, wiping front to back so any streaking would appear to be an effect of the airflow over a 400mph plane.
09:20 PM - Feb 20, 2024
There's still some spotting, but it now has a more overall sea-air appearance, like when your car comes back from a week at the beach. Which, hey, appropriate! This plane served in the Pacific, after all! (Really had to turn down the brightness so you could see the effect here.)

09:25 PM - Feb 20, 2024
The shiny bits in that last pic are metallic paint, meant to depict chipping, where the paint has been worn down to bare metal. This happens in areas that are high-impact (leading edges) and high-traffic (access panels, wing roots where pilots or mechanics stand when boarding or working.
09:28 PM - Feb 20, 2024
There's two ways to depict chipping: adding and subtracting. You either add the color of the under-layers (as I did) or you physically remove the paint (naturally, there's loads of different products and techniques for this).
07:10 AM - Feb 21, 2024
Some people go as far as painting a base layer of bare metal, covering that with a historically accurate primer color, and only then building up layers of the surface color, all so they can wear it off to different depths. That's...whew, that's a lot of work. Not for me, at this point.
07:12 AM - Feb 21, 2024
But back to the task at hand. One of my favorite techniques is using powdered pastels for dirt stains. Chalk pastels, not oil (gotta be dry). I've got this pack of earth tones that can be mixed to create the exact shade needed. Just scrape the stick with the back of a knife till you've got enough.

07:18 AM - Feb 21, 2024
Here's the result of using powdered pastel for exhaust and gunpowder stains, and the first look at the underside! Those holes in the wings are where spent bullet casing were ejected, thus the black. Didn't salt the bottom, btw; gave it a thin coat of sand-colored paint and streaked it with a napkin.


02:05 PM - Feb 21, 2024
The exhaust stains are heavier on the starboard side, top and bottom. Unintentional, but it brings me to how weathering helps tell the subject's story and gives it personality. Maybe this specific plane has some internal damage on that side.
02:08 PM - Feb 21, 2024
We're so close to the finish, guys! Prop is on. All that's left is a couple stray parts I missed, cleaning up the canopy, and a final clear coat. Then the real fun comes: critique!
02:11 PM - Feb 21, 2024
WE DID IT! Around 80 parts and 22 hours of work later, we've got a completed F4U-1 Corsair in early 1943 markings!
Give yourself a pat on the back for making it through the whole thread. Final thoughts still to come, but for now, enjoy the fruits of our labor!
Give yourself a pat on the back for making it through the whole thread. Final thoughts still to come, but for now, enjoy the fruits of our labor!


05:18 PM - Feb 21, 2024
Finishing touches were: added one piece I'd missed (port wing pitot tube, the little pokey bit at the end) and one I'd broken off (antenna in front of the cockpit), then hit everything with a final light, flat, clear coat to fix and protect the weathering.
09:08 PM - Feb 21, 2024
Now, the most important step: where did I screw up and what did I learn? Let's start with the bad:
- Didn't test the white paint I used on the belly; it spattered and didn't stick good, but I mostly covered it with weathering
- Blue paint comes noticeably lower on the right side than left...
- Didn't test the white paint I used on the belly; it spattered and didn't stick good, but I mostly covered it with weathering
- Blue paint comes noticeably lower on the right side than left...
09:10 PM - Feb 21, 2024
...either way would probably look fine, but the asymmetry is ugh
- Hand painted the yellow prop tips; they look bad up close and flake easy
- Gaps got worse with time, especially around the canopy, might need to be more nitpicky about those
- Mold seams much more obvious with paint (see: gaps)
- Hand painted the yellow prop tips; they look bad up close and flake easy
- Gaps got worse with time, especially around the canopy, might need to be more nitpicky about those
- Mold seams much more obvious with paint (see: gaps)
09:14 PM - Feb 21, 2024
-Decals had silvering issues (the transparent borders are visible) and even with Micro Sol, didn't suck to the surface as well as other models I've done. Might be a skill issue, but decals are known to be finicky
-Paint got slightly under the canopy masks and didn't want to scrape off easily
-Paint got slightly under the canopy masks and didn't want to scrape off easily
09:20 PM - Feb 21, 2024
Now, what did I learn?
-Seem to have finally, mostly, gotten the hang of airbrushing. Praise be.
-Salt weathering isn't worth it
-Extra thin paint wiped away with a napkin makes for good streaking
-Preshading with slightly darker and lighter versions of base color looks pretty good
-Seem to have finally, mostly, gotten the hang of airbrushing. Praise be.
-Salt weathering isn't worth it
-Extra thin paint wiped away with a napkin makes for good streaking
-Preshading with slightly darker and lighter versions of base color looks pretty good
09:20 PM - Feb 21, 2024
-Canopy masking is tedious but absolutely worth it, even with leaky masks it worked pretty well
-I can do decent scratch modifications (see: landing gear)
-Trying new techniques and pushing my comfort zone: A+; not rushing but also not getting bogged down on detail: A-
-I can do decent scratch modifications (see: landing gear)
-Trying new techniques and pushing my comfort zone: A+; not rushing but also not getting bogged down on detail: A-
09:23 PM - Feb 21, 2024
A final note: Corsair No.20 of Marine Fighting Squadron VFM 213 was a real plane. You can see it doing a flyby at the 1min mark in the propaganda film "The Fighting F4U." I said back in post 20 that I don't like depicting pilots because "that's a real dude." No.20's pilot was 1st Lt Foy R. Garison.

VMF-213 at Henderson Field, April 1943 Propaganda film. - YouTube
Filmed on Guadalcanal in 1943, this narrated film shows pilots of VMF-123. The groundcrew is probably from VMF-124 For more information, check the VMF-213...
09:40 PM - Feb 21, 2024
He's probably in that film, but I don't know where. His name appears on a chalkboard at one point. Here's his picture.
Foy Garison shot down two enemy planes. He died when No.20 went down in flames on July 17th, 1943, about three months after the film was made.
Foy Garison shot down two enemy planes. He died when No.20 went down in flames on July 17th, 1943, about three months after the film was made.

09:48 PM - Feb 21, 2024
I love these machines. They're fascinating, they're SO fucking cool. But they were made to kill, and kill they did. And I don't know, man. There's a dissonance there. So when I build these things, I'm having fun. I love learning about them. But there's a somber element always in the background.
09:51 PM - Feb 21, 2024
So I try to be respectful. I don't want to depict somebody's death. If I do a crashed plane, it won't be a "real" one. Even for a real one, I try to focus more on the machine in the generic sense.
09:53 PM - Feb 21, 2024
On the other hand, I'll only depict Nazi and Imperial Japanese stuff as destroyed, or soon to be. I've seen too many wehraboos be way too interested in Panzers and the myths of "if Hitler had only X" while insisting they "just think the machine is cool." Not gonna fall into that trap. Fuck Nazis.
09:57 PM - Feb 21, 2024
Anyway, uh, sorry to get all serious. Yay airplanes! This was fun, I hope you enjoyed it!
Now I've gotta weather that partly-assembled wheel loader you might have noticed in the background of a couple pics. Next build will be something simple and fun, maybe an eggplane or Star Wars model. Later!
Now I've gotta weather that partly-assembled wheel loader you might have noticed in the background of a couple pics. Next build will be something simple and fun, maybe an eggplane or Star Wars model. Later!
10:00 PM - Feb 21, 2024
(Oh, one last thing, if you liked this thread, share it! I've really enjoyed the positive responses doing this has gotten.
And I guess if you REALLY liked this thread, I do have a tip button, if you wanna help me replenish my paint supply or something. Love you!)
And I guess if you REALLY liked this thread, I do have a tip button, if you wanna help me replenish my paint supply or something. Love you!)
10:07 PM - Feb 21, 2024


In response to Dead Ted 💀.
My favorite WWII aircraft, by far. Grew up with Pappy Boyington and "Baa Baa Blacksheep"
10:20 AM - Jan 25, 2024